


A doMail campaign lets you send a batch of emails using a selected scenario and prepared data. Each message can have its own recipient and content personalized using your source data. For your first campaign, start with a small test batch and check the result before using the full list.
1. Prepare the template and its parameters
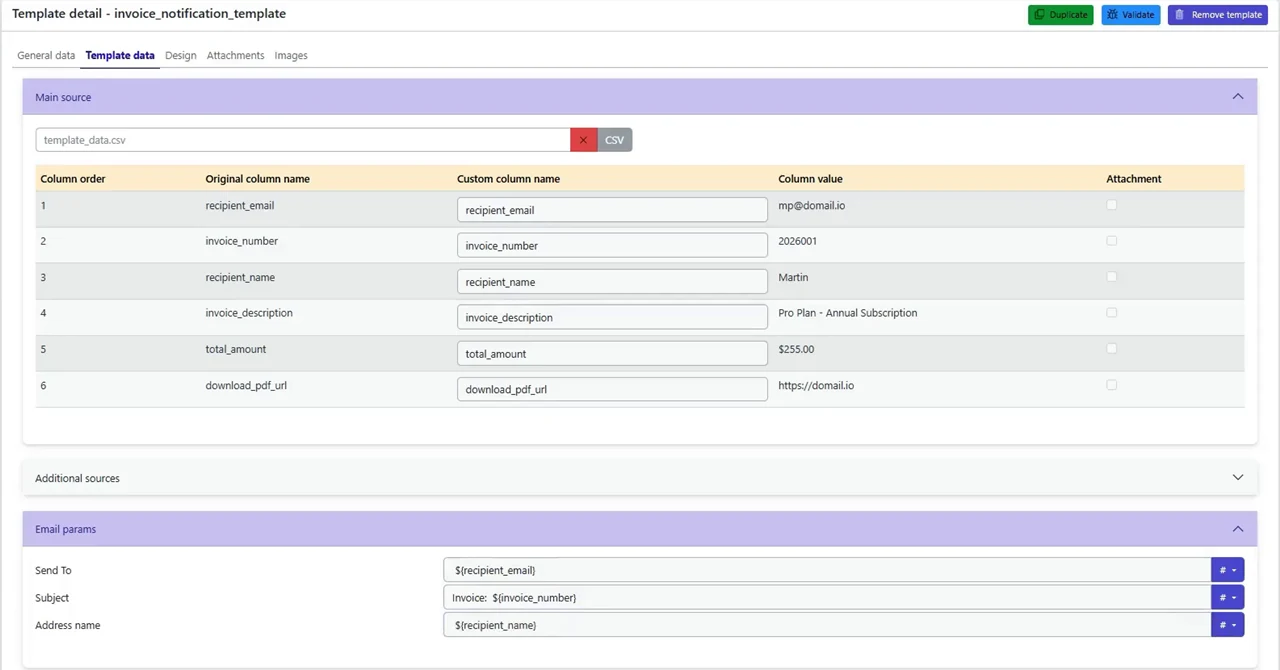
In Configuration → Templates, create a template or select an existing one. Name and save a new template, then use Template data to select the main source format and define the parameters your messages will use.
For a simple test, use key-value pairs. For a batch of records, prepare CSV or JSON matching the template's main source format. For CSV, upload a sample file, select the separator and indicate whether the file contains column names. Review the names, adjust them if needed and accept them. The template defines the data structure; the campaign supplies the actual values.
In the email settings, map the appropriate parameters to the recipient address, subject and address name. In Design, prepare the message content or upload an HTML template. Parameter names must match the data you later supply in the campaign. Save your template changes.
Detailed script and template setup steps, along with sample files, are available in the quickstart.
2. Connect the template to a scenario
In Configuration → Scenarios, create a scenario, give it a name and select the SOAP/REST with template type. Select a script and your prepared template from the lists. After saving the scenario for the first time, enable it and save the change. You can also use an existing suitable scenario for a new campaign.
The template defines the message content, while the scenario and script handle processing. Before creating the campaign, check that the scenario uses the intended template.
3. Create the campaign and supply its source data
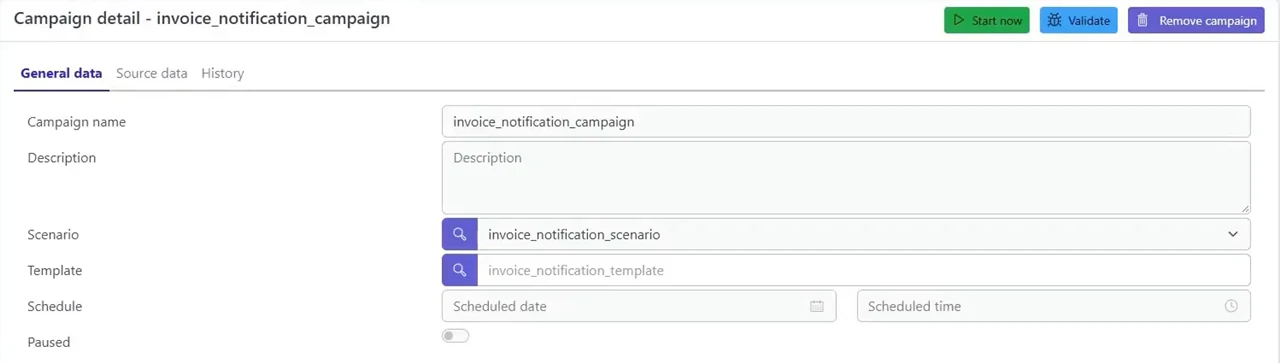
Open Campaigns → Add campaign, enter your own campaign name and select the scenario you want to use from the list. Save the campaign, then open Source data and enter values or upload a file in the format expected by the template. The data must match the expected structure and contain the values for this particular batch.
- Check recipient addresses and the values required by the template.
- For CSV or JSON, check that field names and structure match the source definition.
- For the first test, use your own addresses and a few records that let you verify personalization.
Save your changes and select Validate. Resolve any reported issues before starting. Validation does not replace checking the resulting email after a test send.
4. Start now or schedule the campaign
To schedule the campaign, set its start date and time in the general settings and save your changes. To run the campaign immediately, select Start now. Check the paused setting as well: immediate start is unavailable while the campaign is paused.

You can also review campaign executions in the History tab. Before starting the campaign again because a result has not appeared yet, check whether processing is already running and which communications have been created.
5. Check the communications list
After starting the campaign, open Communications. New records may take a few seconds to appear in the list. Check the generated communications, recipients, processing states and delivery states in the table. If needed, filter the list by the start time and scenario used.
To investigate a particular message, open its detail. For a dispatched message, use Preview to check the subject, greeting and the custom values inserted for each recipient.
If processing or dispatch failed, continue with Troubleshooting email processing and sending errors.